
Tuesday, May 14, 2013
Finished! (mostly)
Aside from the fact that I can't find a backslash that I love, the kitchen is finished enough. :)
 Feel free to comment or ask me any questions. I hope that I may have helped others in some small way.
Saturday, October 6, 2012
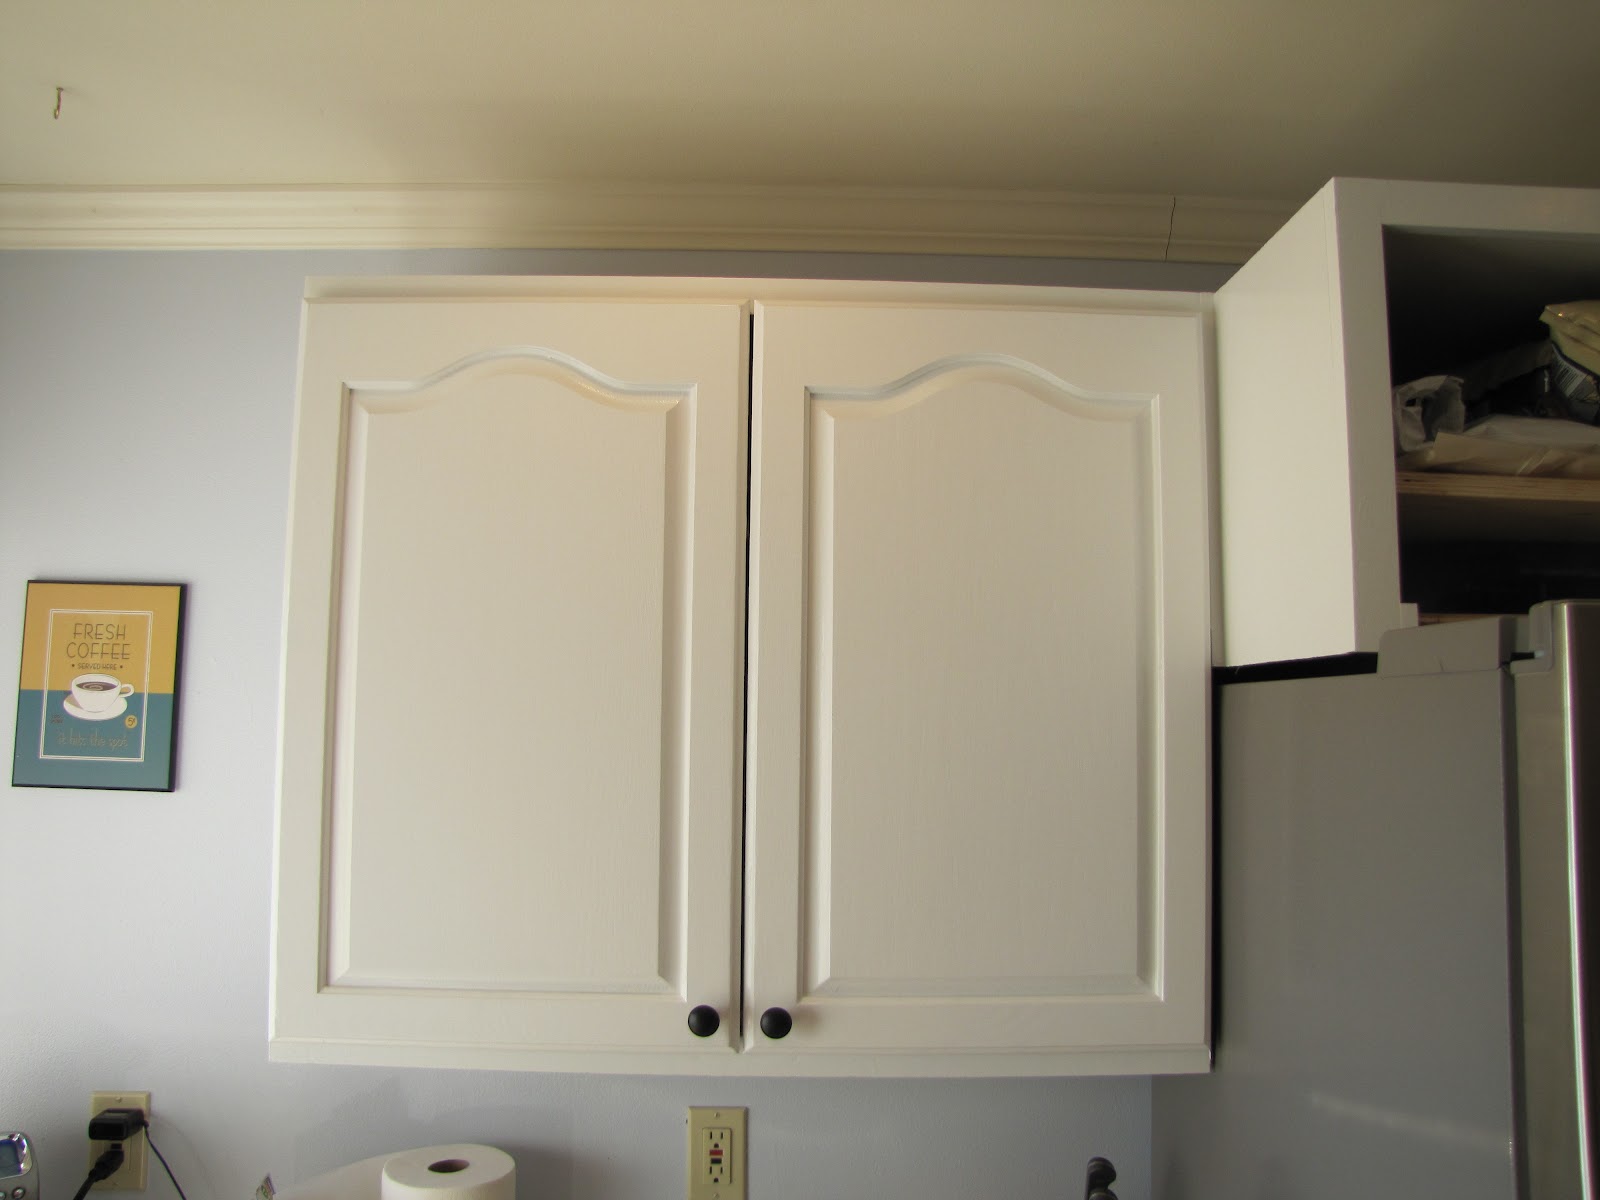
Sneak Peek of cupboard #1
I finally finished coat 2 and let it cure enough to hang. Attached the hardware, had some help from hubby adjusting them and, voila, here is the first one! I can't wait to see the rest of it!

Tuesday, September 25, 2012
Slowly, slowly, the cabinet painting begins.

Plate cabinet before. It's blurry, and I had already taken off 1 side, but you get the idea.
 I cleaned, and cleaned, the cabinet doors with TSP. If you use this, wear gloves! Despite the fact that I do wipe down the cabinets about once a month, they were really icky. I did NOT sand them. I primed them with Zinsser 123 primer. It is a bonding primer that sticks to shiny surfaces. I felt that the spots on my kitchen table that were not sanded, came out so much better. This primer is great, and it dries fast.

 Primed and painted the cabinet box.
 For no particular reason, Refrigerator #2. (I love it, but it's going back because it doesn't work properly)
Sunday, August 26, 2012
A disappointment and a work in progress.
The new refrigerator was delivered yesterday while I was at a birthday party with my son. I went to check it out when I go home and noticed the doors were at least a quarter inch off and there was a large dent in the door and several scratches, one of them at least 6 inches long. We called the store and to make a long story short, were pretty ticked after speaking to some very rude employees, it turns out that they sent us the floor model. We did buy it on clearance, but wanted a new one, so we called several stores and were assured we were getting a brand new one in a box. (the last one in the area) Either way, I am not happy and am waiting to hear back from the store manager about how they are going to make it right. It is really too bad because the fridge is really cool. (They Griswolded fridgey on their way out, or I might ask for it back.)

 One of the scratches.
 Getting ready to hang the upper. ($40)
 Upper cabinet hung, working on a counter.
 New counter top.
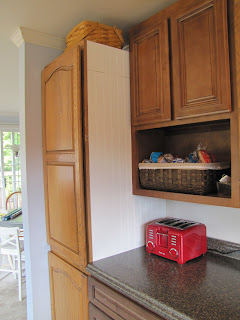 A piece of leftover bead board to cover unfinished panel on tall cabinet.

 I wanted to put a coffee station here, but the cabinet is too low, so it is a toast station. Toast anyone?
 Increased counter space by 1/3rd! Nothing matches, no paint yet, but very functional! We are on our way. :) (I might just be able to win an ugly kitchen contest now)

 One of the scratches.
On another note, we put a big piece in the puzzle kitchen this weekend.
 Getting ready to hang the upper. ($40)
 Upper cabinet hung, working on a counter.
 New counter top.
 A piece of leftover bead board to cover unfinished panel on tall cabinet.
 I wanted to put a coffee station here, but the cabinet is too low, so it is a toast station. Toast anyone?
 Increased counter space by 1/3rd! Nothing matches, no paint yet, but very functional! We are on our way. :) (I might just be able to win an ugly kitchen contest now)
Friday, August 24, 2012
Fridgey kicked the bucket.
Our GE side by side went kaput last weekend. We had a pretty hot heatwave here in the PNW, and that was it's demise.
On the brighter size I got to spend my entire kitchen budget on a new refrigerator. I found a beauty on clearance and hope it will serve us well for years to come.


 Above is the old fridge. Yes, we have a lot of magnets. We get them as souvenirs whenever we go on a trip.
They won't stick on the new fridge though. It's stainless. However, it has a nifty screen that I can upload photos to. My genius sister suggested scanning the kids artwork to display.


On a side note, I am frustrated with the "oven hole" and feel it is a shame to have such a fancy new refrigerator com home to such a kitchen. The curtain is kind of cute, but the inside of the "cupboard" isn't very functional. Whenever I reach in to dig for a utensil in the bin, it messes up my hair! ;)
I am considering Rust-Oleum Cabinet Transformations, and Rust-Oleum countertop covering, (the paint, not the epoxy).
 I purchased a 27" base drawer cabinet on craigslist for $65. Sorry about the picture quality, it was taken with my cell phone off my computer screen.
I am going to check out a wall cabinet today.
Hoping to buy a piece of counter at Ikea tomorrow.
Wish me luck.
I also need to give MAJOR credit to my uncle Keith, who helped us install the new range. He was amazing in that he prepared for future remodel, and was very careful to make the counter top cuts more than livable.
On the brighter size I got to spend my entire kitchen budget on a new refrigerator. I found a beauty on clearance and hope it will serve us well for years to come.


They won't stick on the new fridge though. It's stainless. However, it has a nifty screen that I can upload photos to. My genius sister suggested scanning the kids artwork to display.


On a side note, I am frustrated with the "oven hole" and feel it is a shame to have such a fancy new refrigerator com home to such a kitchen. The curtain is kind of cute, but the inside of the "cupboard" isn't very functional. Whenever I reach in to dig for a utensil in the bin, it messes up my hair! ;)
I am considering Rust-Oleum Cabinet Transformations, and Rust-Oleum countertop covering, (the paint, not the epoxy).

I am going to check out a wall cabinet today.
Hoping to buy a piece of counter at Ikea tomorrow.
Wish me luck.
I also need to give MAJOR credit to my uncle Keith, who helped us install the new range. He was amazing in that he prepared for future remodel, and was very careful to make the counter top cuts more than livable.
Monday, August 6, 2012
Dining table, Day 2.


First layer of poly done. As you can see, the "wood grain" shows through. This is why I wish I had sanded it more. Maybe someone else will learn from my mistakes.
All done!


We will wait a few days for it to cure before we use it.
Starting today - Dining set
This was a much bigger project than I anticipated. I left the house at around 9am for supplies, knowing what I needed. In the store(s), I could not find the supplies I was looking for. Nobody would help me. (I have to admit, I did browse a bit)
At 11 I arrived home with most things I needed. I bought Zinsser 1-2-3 primer, sanding pads for my mouse sander and Varathane polyurethane (not really what I was looking for I hope it works). Then we took Table and it's leaf out on the deck and put it on a drop cloth.
I usually keep this table round, it takes up less space. It has a very large leaf we use when we have company. I prefer a round table because we have 5 in our family (one of the reasons this blog is so scattered) and we can keep it small and still fit around it.
I lightly sanded the top of Table with my Mouse. (In hindsight I wish I had sanded it much, much more) (yes, I love parentheses) :) Here are some pictures of day 1.

 Then, my 11 year old Daughter and I, carefully cleaned the table with vinegar and water. We even used an old toothbrush in the detailing and the edge on the side.
Here comes the primer! I probably went overboard with 3 coats.


 Might I add it was a record breaking 92 degrees yesterday? I made Hubby get out the camping sunshade so the paint wouldn't bubble. The friendly professional painter that lives next door gets credit for this reminder.
Paint: I used leftovers from the gust bathroom. Shiny white trim paint (an actual white color, sorry I don't remember the name of it) for the pedestal, and Gray (I think It is Pencil Point) for the top.


 After all the primer, the pedestal trim paint went on beautifully with one coat, I almost wished I had used it on the whole table. (too late). The next dilemma, to leave Table outside or bring it in. Despite it still being 90 degrees at 8pm, it was still a bit tacky. (perhaps the 6 layers of paint) It can get dewy in the night here in rain country, so in it came.


 After a brief freak-out, (hey, I was really tired), hubby calmly brought the paint back in from the garage and handed me a couple of really nice little touch up brushes. Good as new.


At 11 I arrived home with most things I needed. I bought Zinsser 1-2-3 primer, sanding pads for my mouse sander and Varathane polyurethane (not really what I was looking for I hope it works). Then we took Table and it's leaf out on the deck and put it on a drop cloth.
I usually keep this table round, it takes up less space. It has a very large leaf we use when we have company. I prefer a round table because we have 5 in our family (one of the reasons this blog is so scattered) and we can keep it small and still fit around it.
I lightly sanded the top of Table with my Mouse. (In hindsight I wish I had sanded it much, much more) (yes, I love parentheses) :) Here are some pictures of day 1.


Here comes the primer! I probably went overboard with 3 coats.


Paint: I used leftovers from the gust bathroom. Shiny white trim paint (an actual white color, sorry I don't remember the name of it) for the pedestal, and Gray (I think It is Pencil Point) for the top.


 After all the primer, the pedestal trim paint went on beautifully with one coat, I almost wished I had used it on the whole table. (too late). The next dilemma, to leave Table outside or bring it in. Despite it still being 90 degrees at 8pm, it was still a bit tacky. (perhaps the 6 layers of paint) It can get dewy in the night here in rain country, so in it came.


Good enough anyway.
I am now going to attempt to apply the polyurethane, in the kitchen, with 3 kids running around. (Yes, the windows and doors are all open.)
Subscribe to:
Posts (Atom)